Imagine sharing a file with a third party, only to later realize that you’ve accidentally included personal data. This mistake can lead to a colossal blunder and privacy loss. That’s why it’s important to check all files before sharing. Don’t know how to inspect documents for sharing? We’re here to help.
Luckily, a document inspector feature allows users to examine their files before sending them out. You can use this tool to catch any sensitive data and personal information you may have missed. This ensures that you maintain security and privacy.
Wanting to protect your privacy and information when sharing files is important. Let’s take a look at how you can do that.
What Is Document Inspector?
Document Inspector is a unique and helpful feature in Excel, Word, Visio, and PowerPoint. It helps the user to delete any personal or hidden data appearing in the final document before you share it.
While protecting a Word file with a strong password, you can also use the document inspector feature to eliminate unwanted properties of a file. This tool aims to remove unnecessary information and prevent personal data from being exposed to a third party. It is an excellent editing feature that cleans a file of information that might be confidential.
What Does Word’s Document Inspector Check?
Here are a few things that this tool checks:
- Invisible content
- Hidden text
- Collapsed headings
- Watermarks, footers, and headers
- Personal information
- File properties
- Revision marks
- Comments
Suppose you have created a file with the help of a team. In that case, the document may have remarks, comments, and texts that you might want to keep private.
Similarly, office programs also maintain file properties that include the document’s author, subject, and title. They may also have certain email addresses you might not want to appear and be visible to readers. document inspector comes in handy here. It removes all such information before you plan to share the final file.
How to Inspect Documents for Sharing
If you can’t risk sending out a document without checking it for your sensitive information, here are a few simple steps you can take with the document inspector.
Step 1: Click on the File Tab
Once you have prepared your file, click on the “File tab” followed by “Info” and “Inspect Document.”
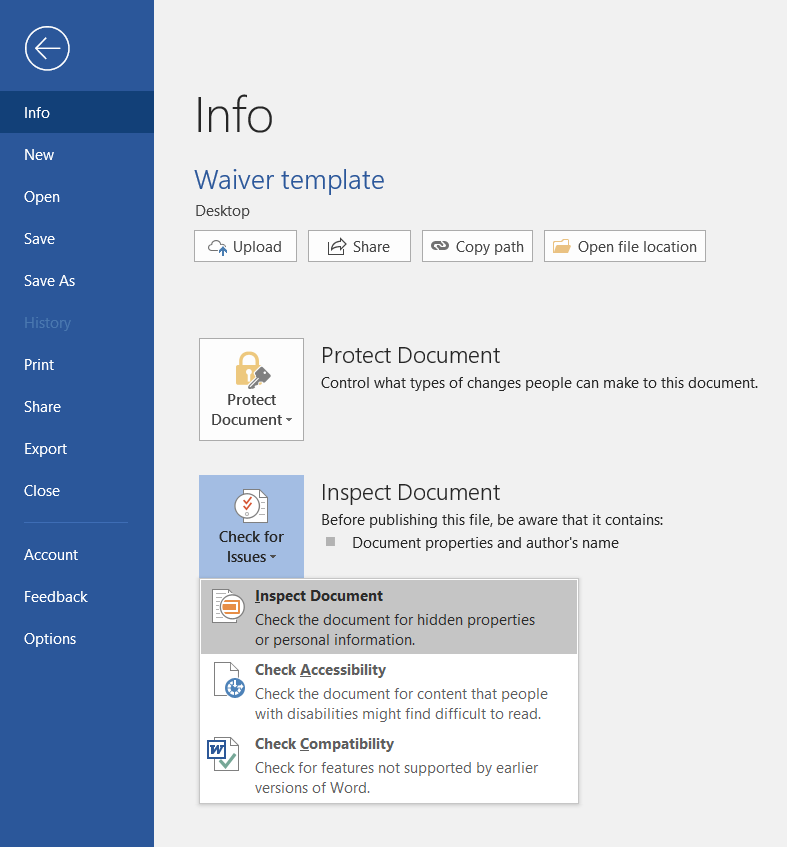
Step 2: Inspect with Document Inspector
There you will see a drop-down list. Click on “Check for Issues” and then “Inspect Document,” which appears in the document inspector box.
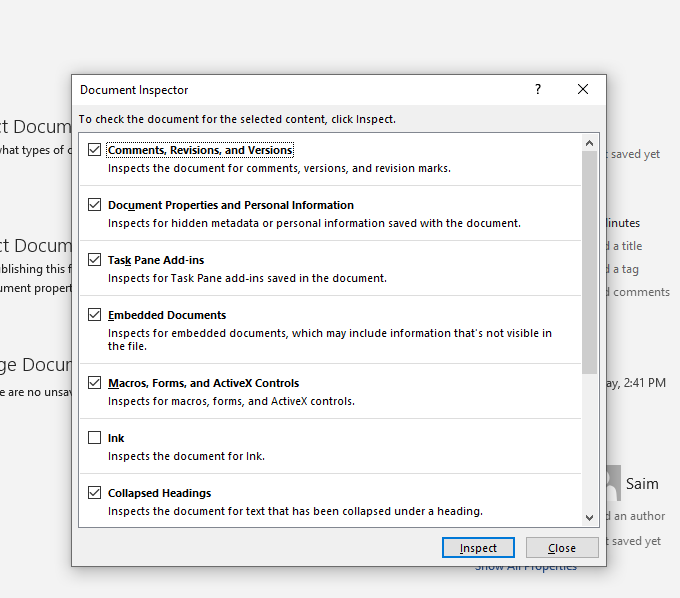
Step 3: Remove
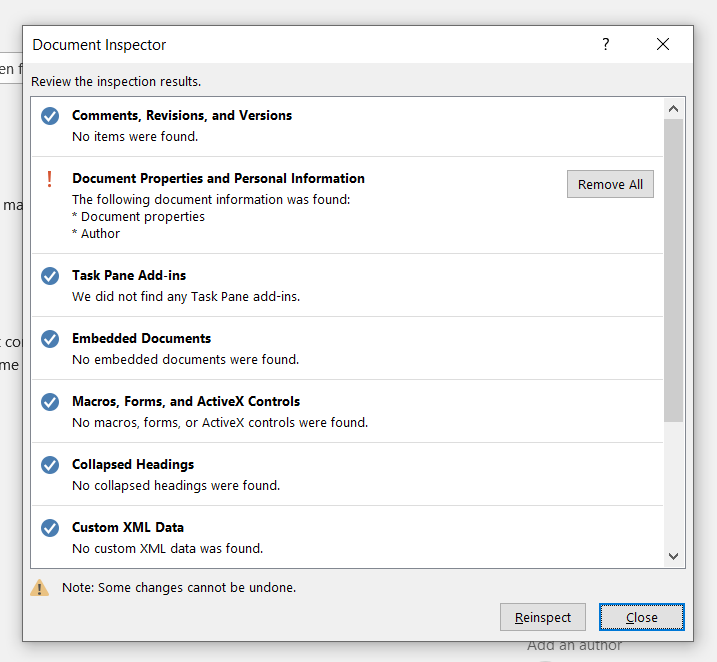
Select the information you may want to remove by checking the boxes and then hit “Inspect.” Once that’s done, click on the “Remove All” button. If you want to reinspect the file, click “Reinspect” before “Close.”
Final Thoughts
File sharing is risky, especially if it contains sensitive or personal information. With a document inspector, you can ensure that all your hidden data and document properties are identified and that you are protected.
It is essential to ensure the security of your files. Thankfully, with SecureDocSharing, you can send your document safely and without compromise. This app is easy to use and uses a link-sharing technique to maintain your file’s privacy.